| Excerpt | ||||||||||
|---|---|---|---|---|---|---|---|---|---|---|
| ||||||||||
|

| Panel | ||||
|---|---|---|---|---|
| ||||
General Information |
| Section | ||||||||||
|---|---|---|---|---|---|---|---|---|---|---|
|
| Panel | ||
|---|---|---|
| ||
On this page |
| Table of Contents | ||||
|---|---|---|---|---|
|

 Description
With this app, the goal is to simplify the user experience, empowering the users with role Project Admin the ability to make or modify the priority matrix in a friendly way through the project configuration and creating two separate fields in the Project level.
Depending on the need, one can be in the ticket creation which is filled in by the reporter (Urgency) and the other in the edition, which is filled in by the agent (Impact) or both can be available from the creation of a new Issue or editing an Issue.
In this way the Priority field is calculated automatically at each Urgency/Impact change and not at the user's discretion.
How does it work?
It is really easy
., but Project Admin role is needed to create the first configuration of the Priority Matrix
1.
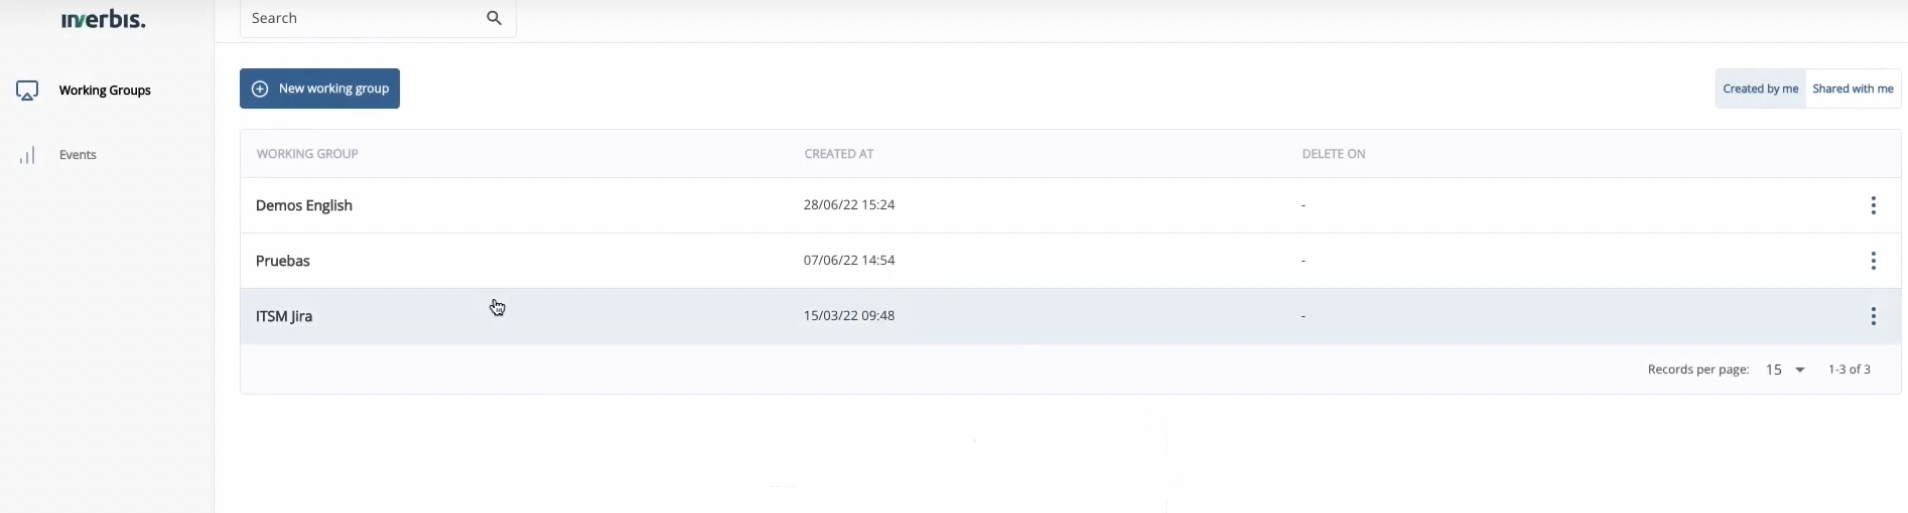
Log on to InverbisGo to your "Project settings" and click in "Apps" → "Priority Matrix"
You can access here to your Inverbis account.
2.
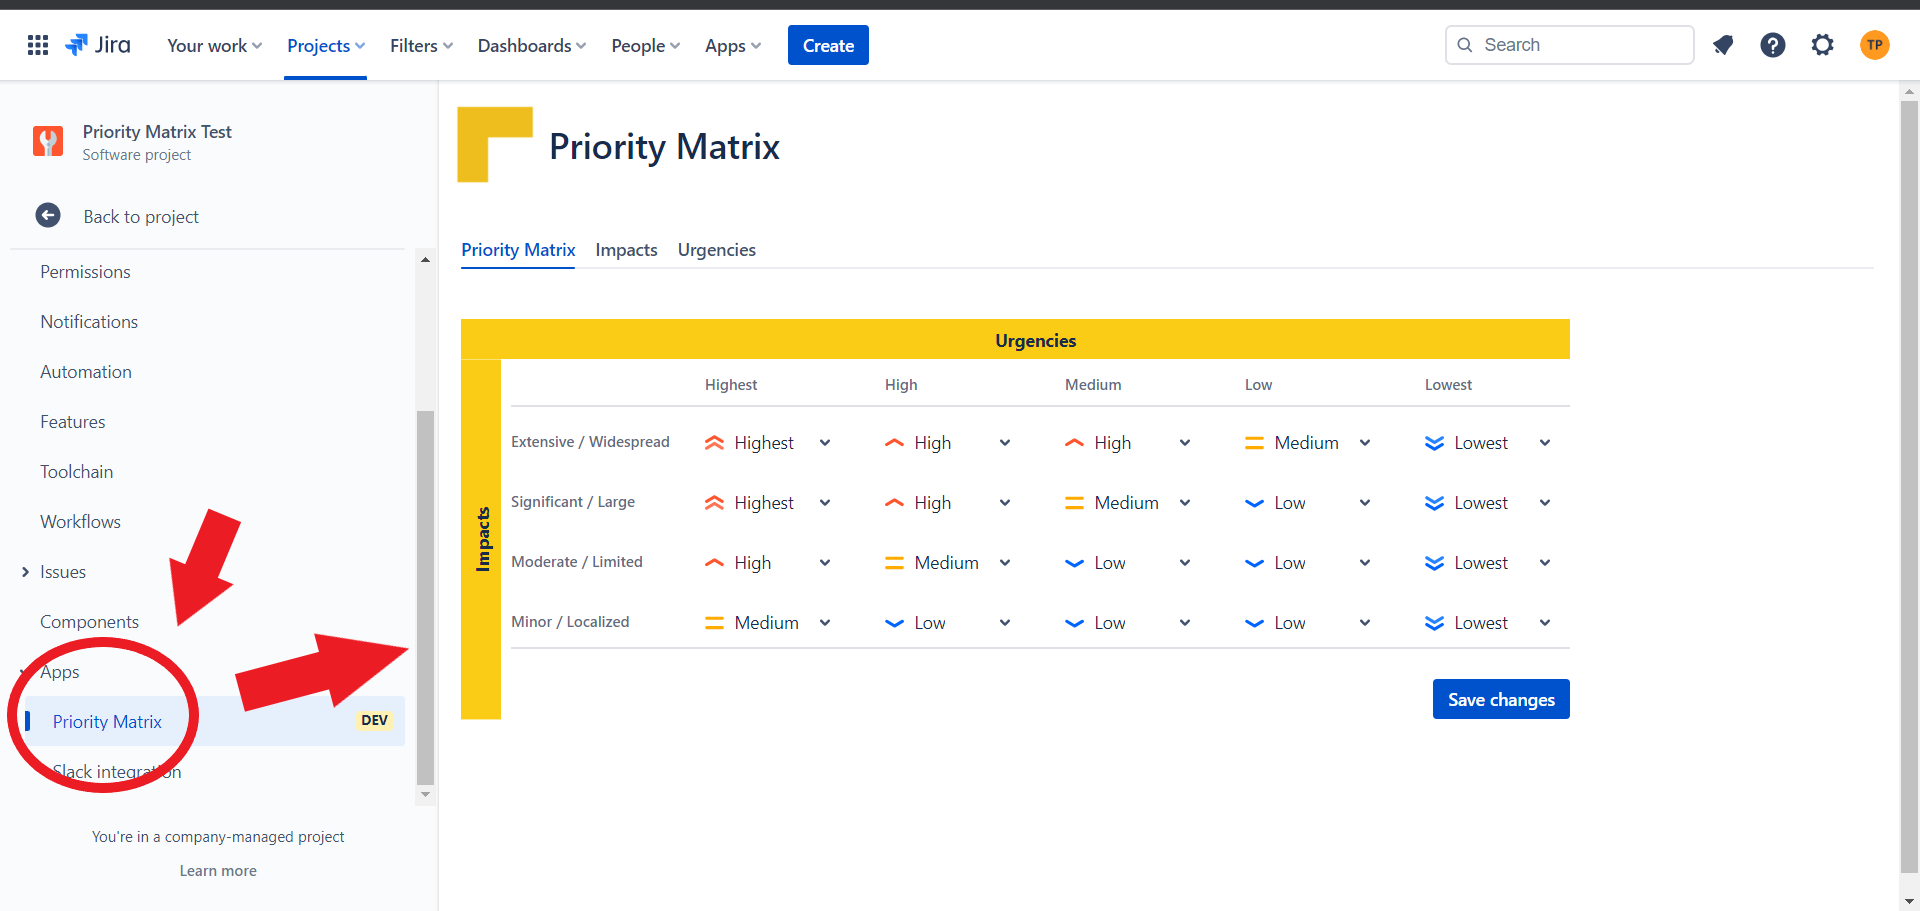
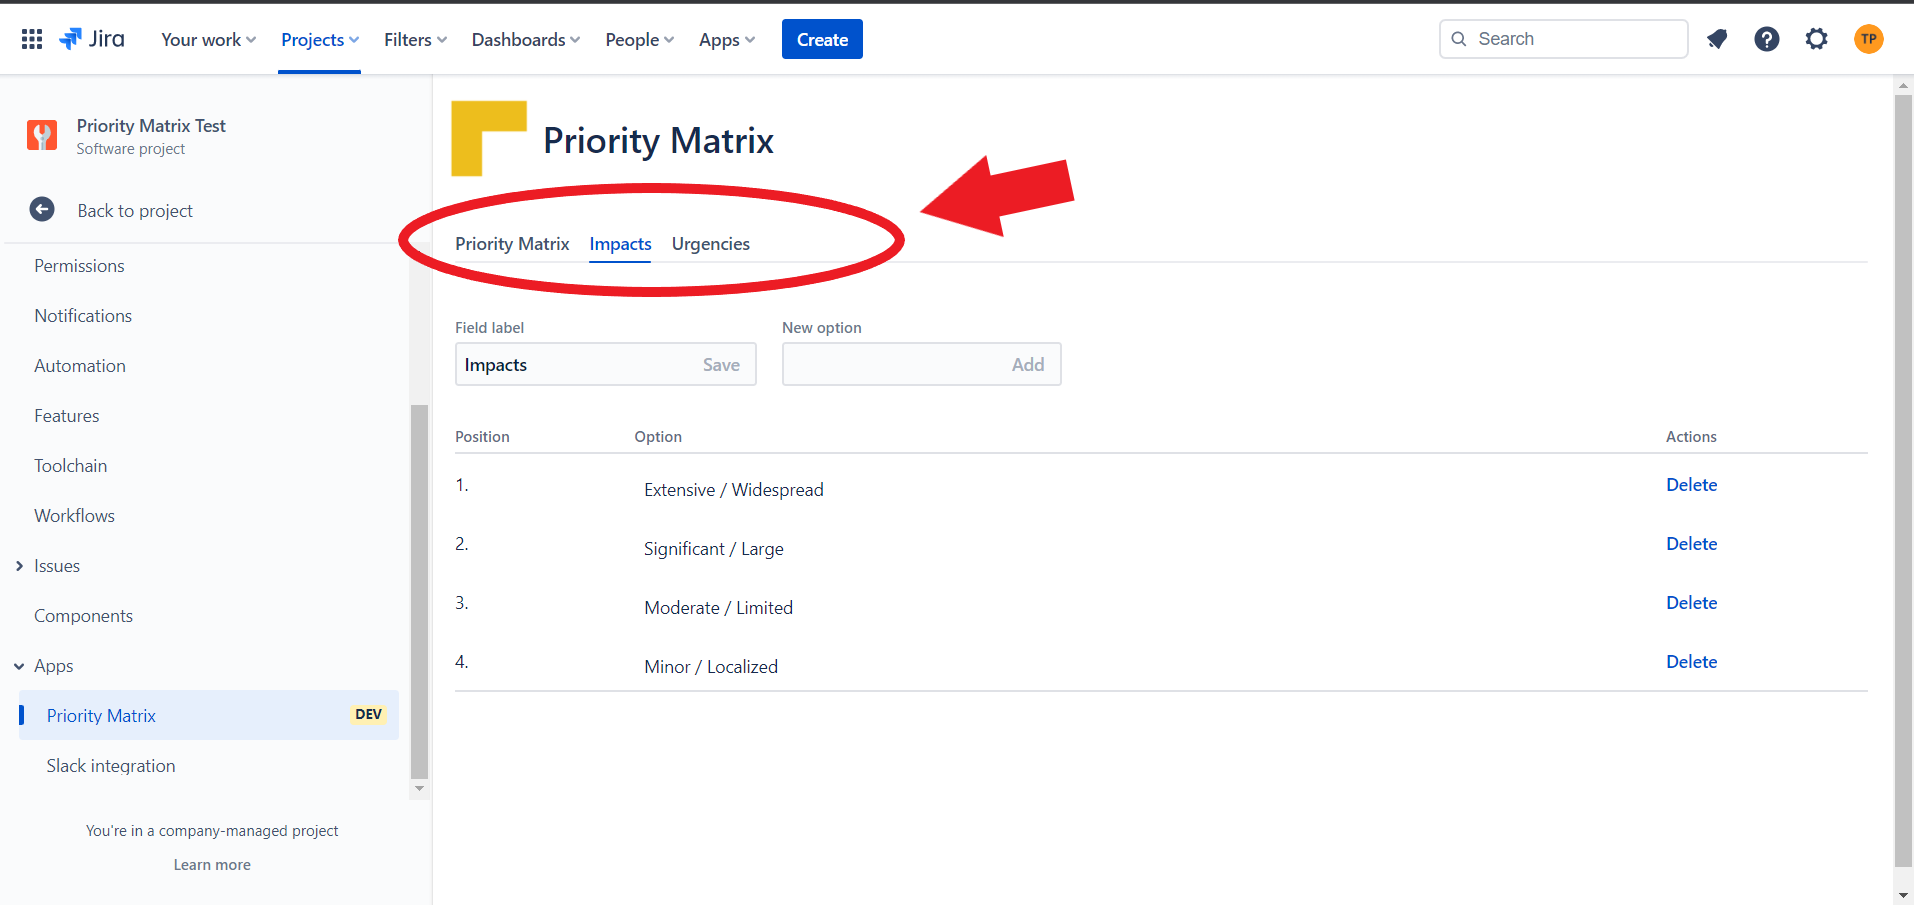
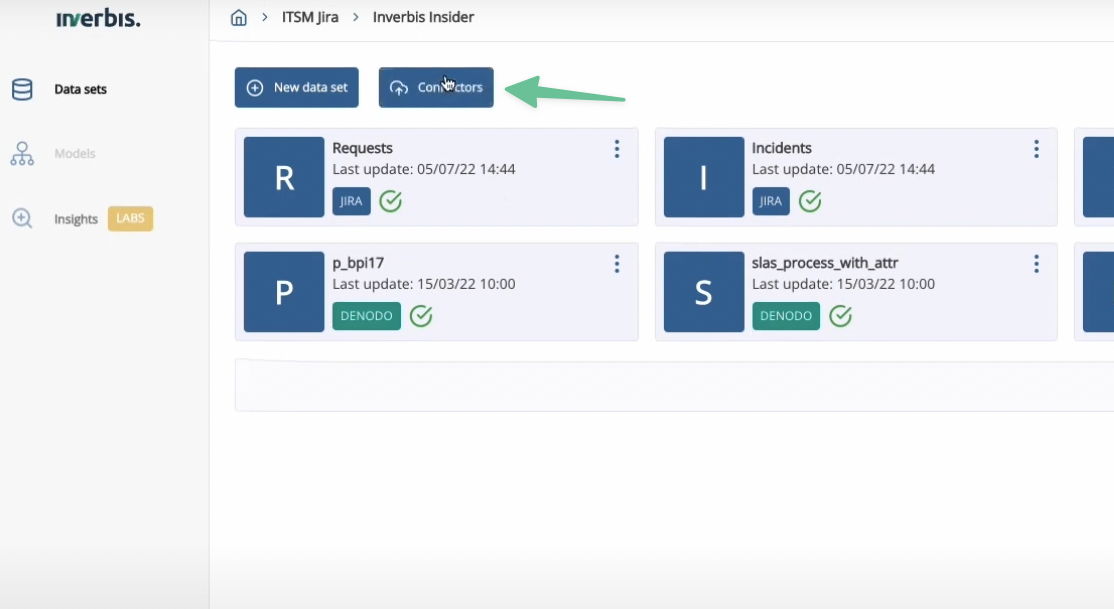
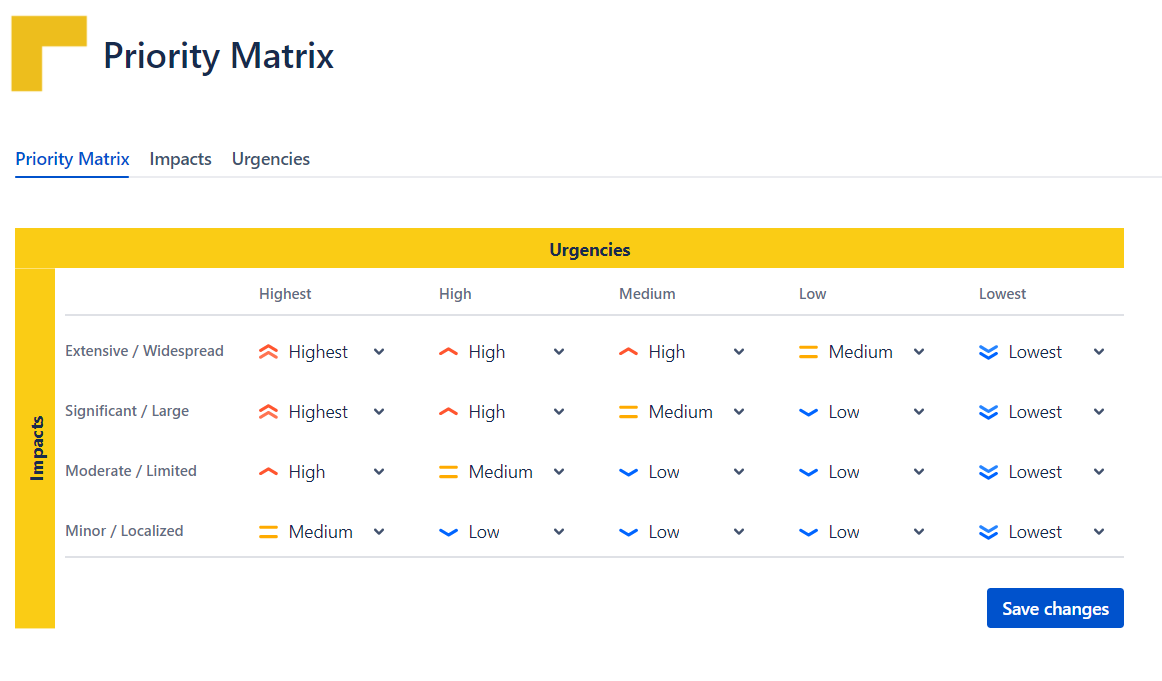
Select the workgroup and the project (or create a new one)Click in "Impacts" in the Priority Matyrix screen and fill the values like in this example
3.
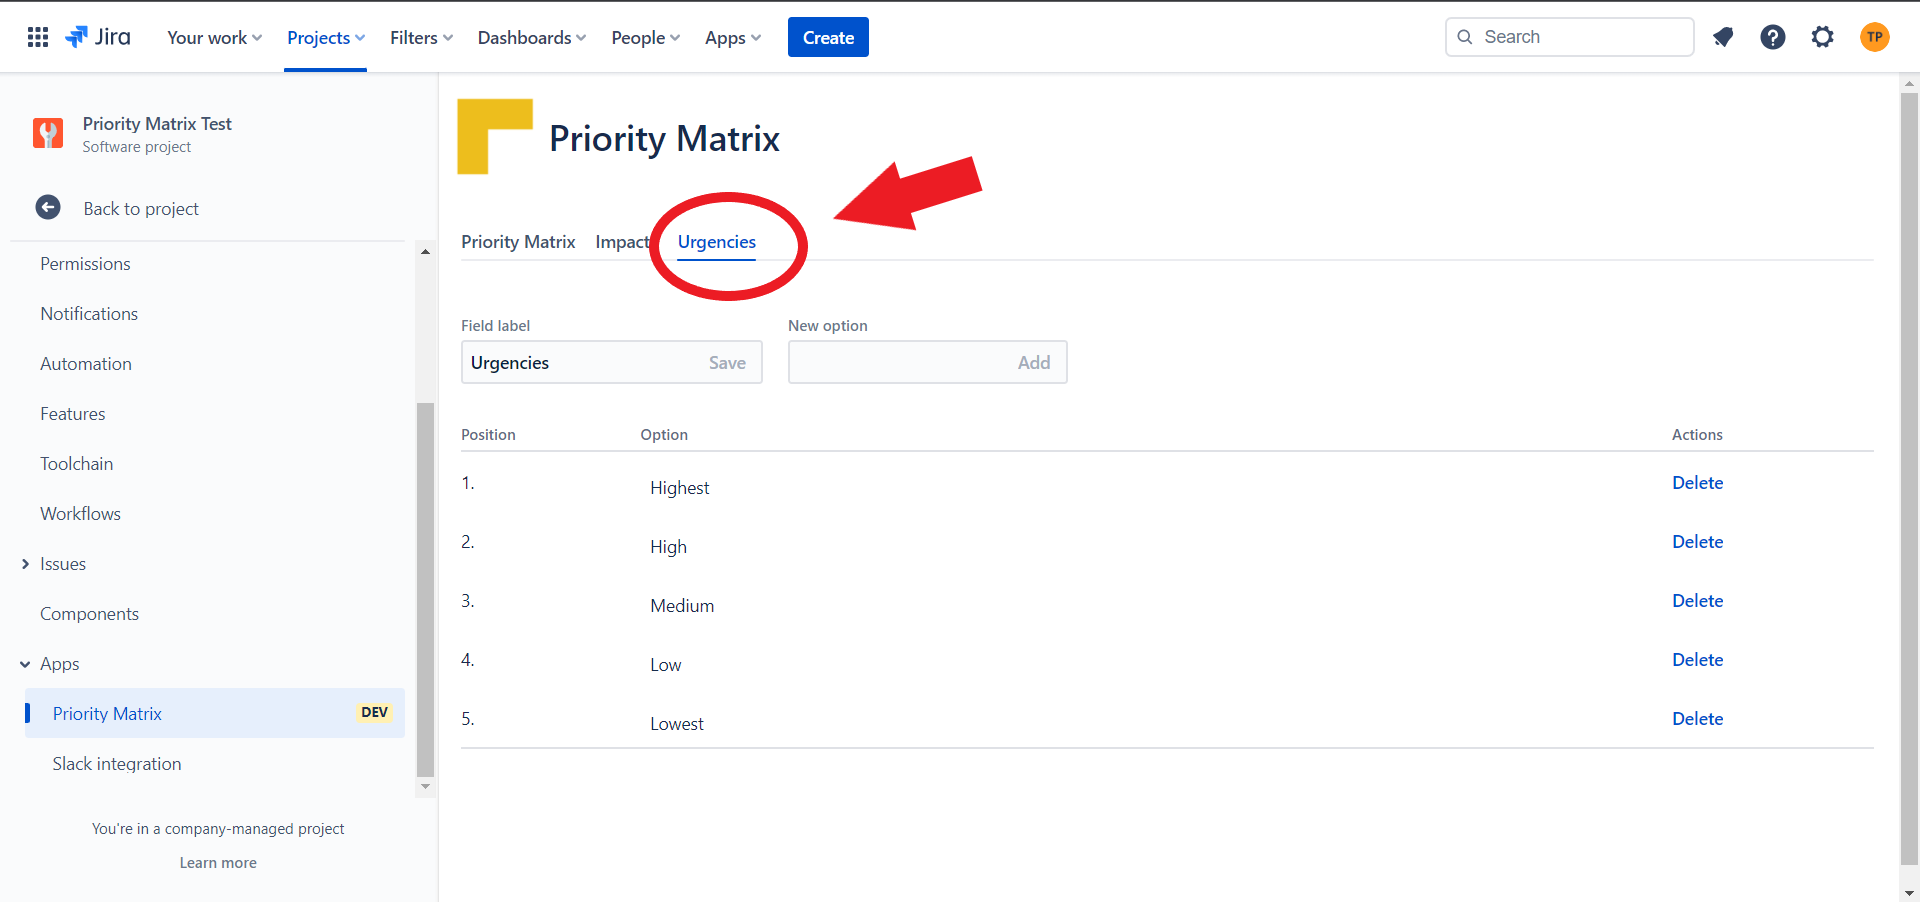
Once in the project, select “Connectors”Click now in "Urgencies" and complete the rest of possible options for the Issues of the Project
4. Select
Jira and press “Continue”"Priority Matrix" and complete the values with the possible Priority options. Click "Save changes"

5.
Input the credentials for the Jira environment and press continue
6. A list of the workflows available in the instance will appear, select the workflows you want to import
Summary information of what you selected will show.

7. The information will be imported through the connector and will appear with the label “Jira”
8. Select the dataset to start your analysis
You will be able to see the real execution of the workflow in inverbis, with its variants, loops, process metrics…

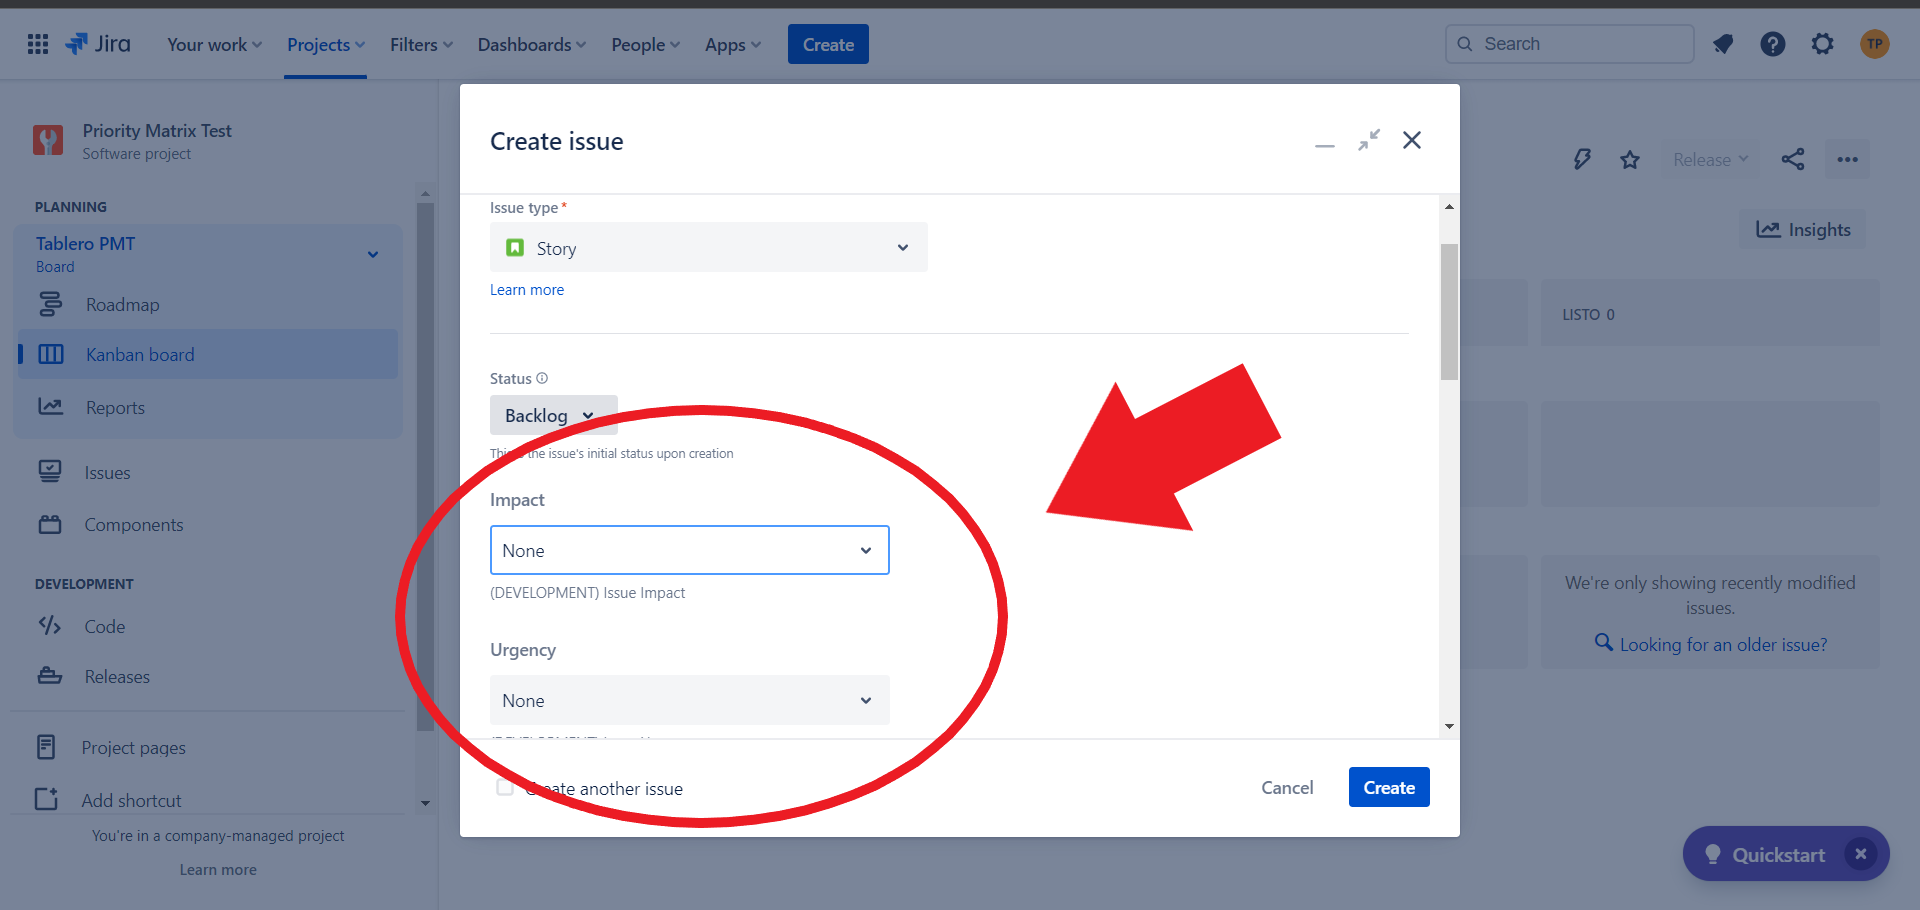
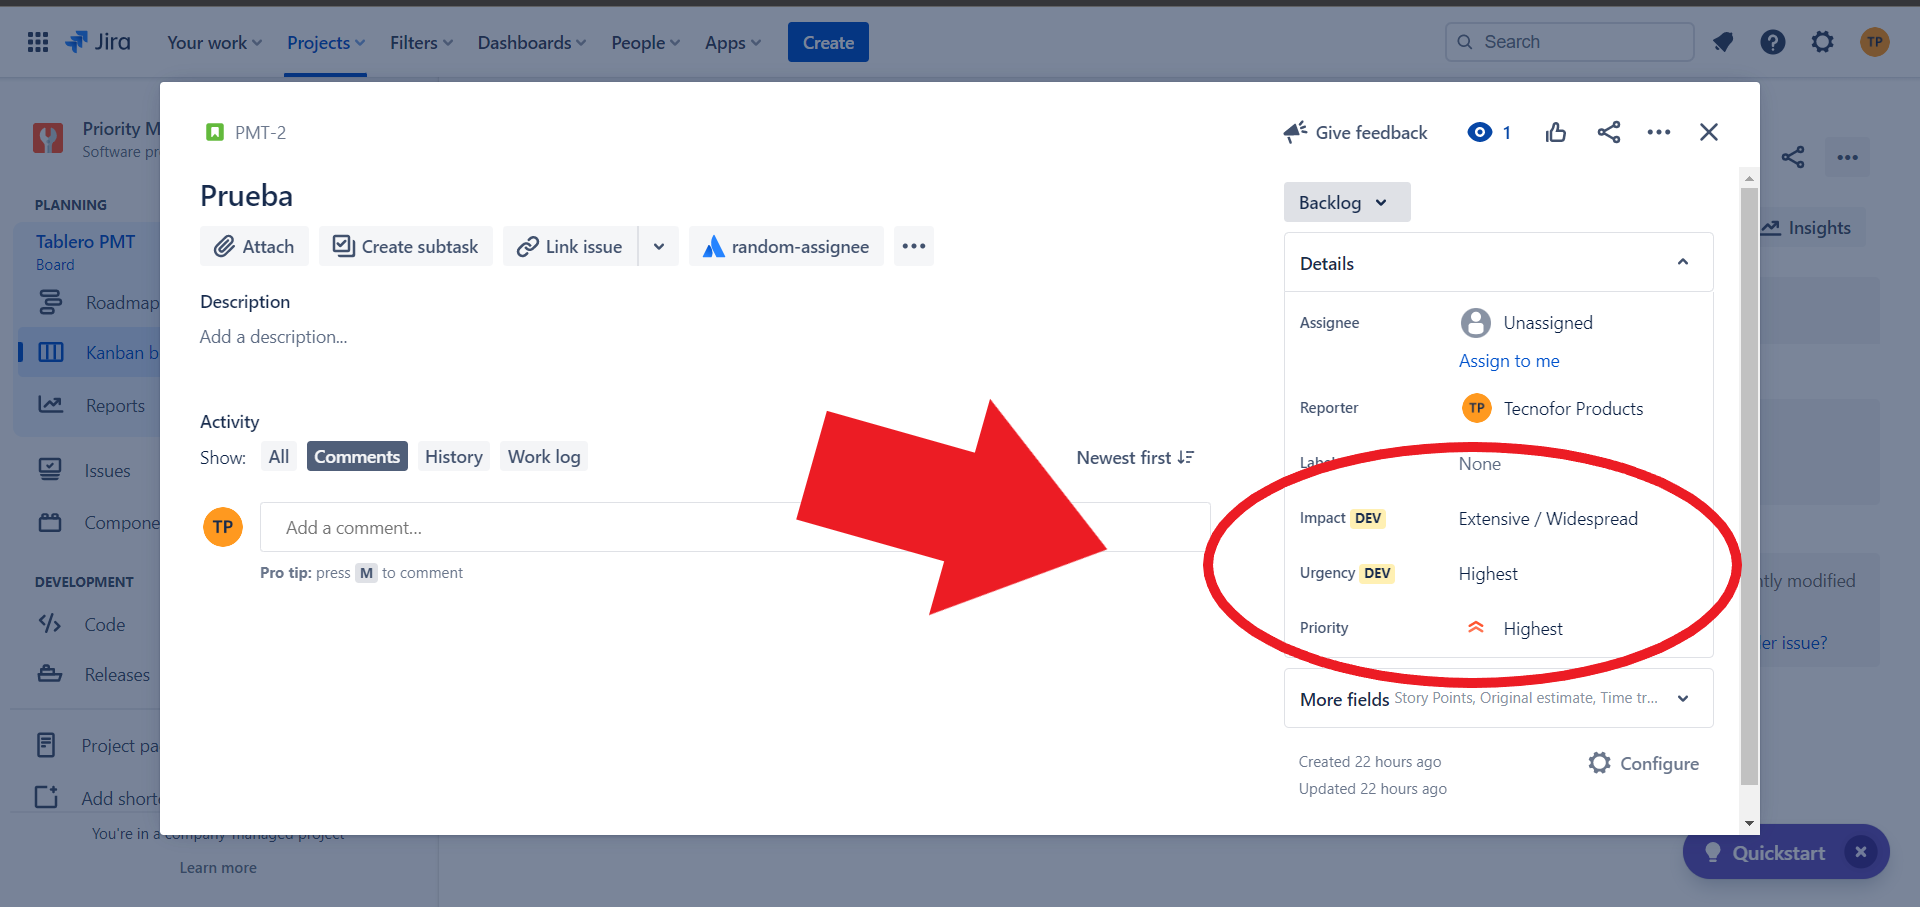
It's turn to test the new feature! Create a new Issue in the project and select both values "Impacts" and "Urgencies"
6. You can also edit an Issue and recalculate the Priority changing the values of Impact and Urgency
7. That's all! We will introduce new powerful features in the next months!
| Panel | ||||
|---|---|---|---|---|
| ||||
Release Notes |
2023-01-07 First public version of the App