| Excerpt | ||||||||||
|---|---|---|---|---|---|---|---|---|---|---|
| ||||||||||
|

| Panel | ||||
|---|---|---|---|---|
| ||||
General Information |
| Section | ||||||||||
|---|---|---|---|---|---|---|---|---|---|---|
|
| Panel | ||
|---|---|---|
| ||
On this page |
| Table of Contents | ||||
|---|---|---|---|---|
|

 Description
More info:
👉 https://web.inverbisanalytics.com/inverbis-jira-connector/
78% of people who automate say process mining is key to optimizing their RPA efforts, that’s why we created our JIRA connector.
Inverbis find for you where your best automation opportunities are.
- Now you will be able to connect Jira to Inverbis in seconds.
- You will have a real vision of your business progress.
- Use it before planning your migration or creating an RPA strategy, to focus on what makes sense and adds value.
- You can request information about Inverbis licensing and its connector policy at this contact form.
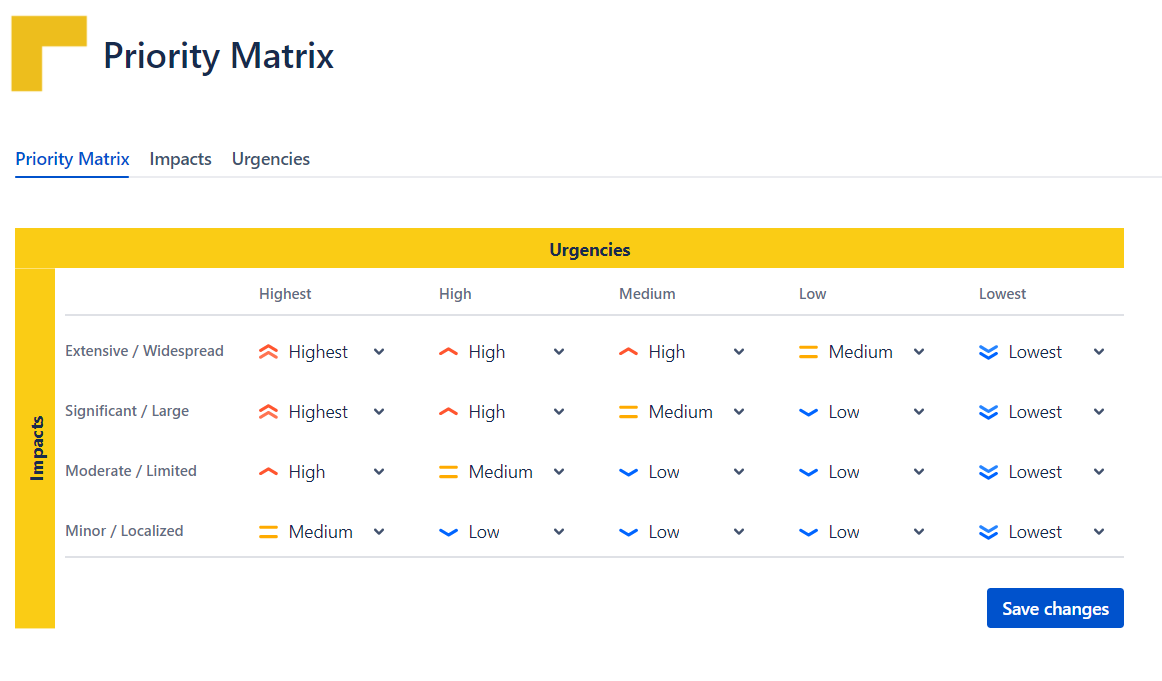
With this app, the goal is to simplify the user experience, empowering the users with role Project Admin the ability to make or modify the priority matrix in a friendly way through the project configuration and creating two separate fields in the Project level.
Depending on the need, one can be in the ticket creation which is filled in by the reporter (Urgency) and the other in the edition, which is filled in by the agent (Impact) or both can be available from the creation of a new Issue or editing an Issue.
In this way the Priority field is calculated automatically at each Urgency/Impact change and not at the user's discretionThis connector requires a Starter, Advanced, or Enterprise subscription to Inverbis.
How does it work?
It is really easy.
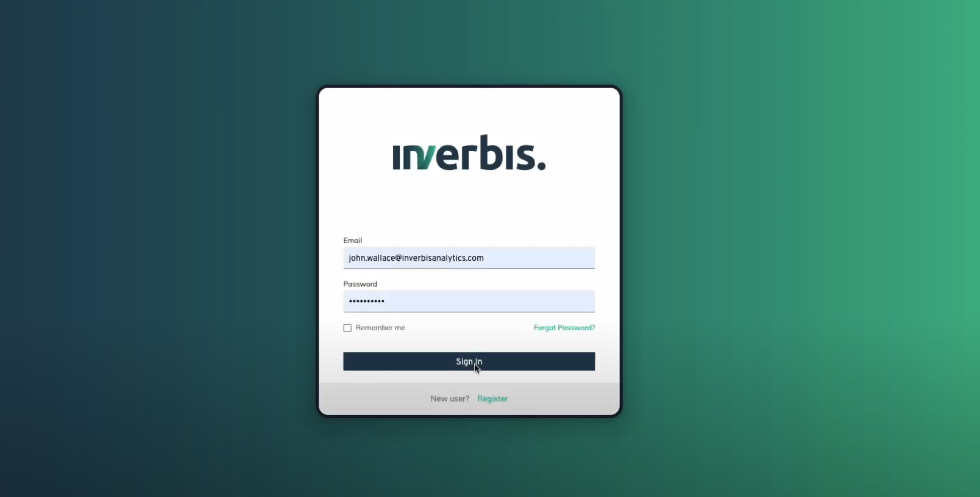
1. Log on to Inverbis
You can access here to your Inverbis account.
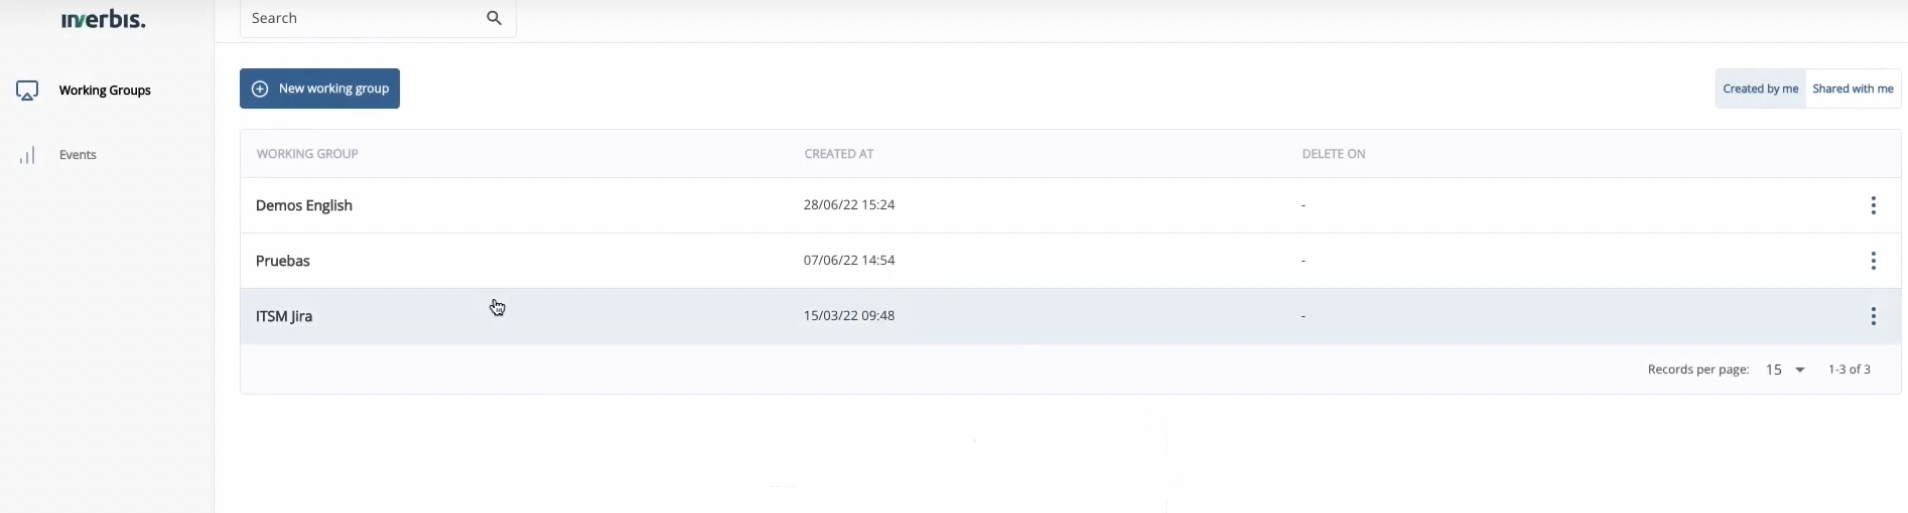
2. Select the workgroup and the project (or create a new one)
3. Once in the project, select “Connectors”
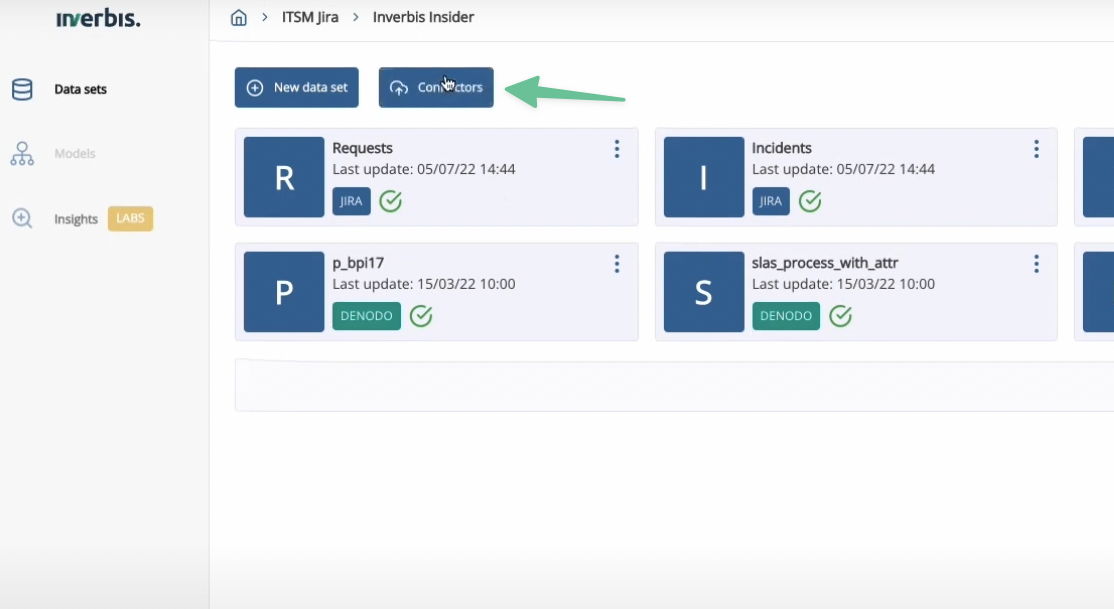
4. Select Jira and press “Continue”

5. Input the credentials for the Jira environment and press continue

6. A list of the workflows available in the instance will appear, select the workflows you want to import
Summary information of what you selected will show.

7. The information will be imported through the connector and will appear with the label “Jira”
8. Select the dataset to start your analysis
You will be able to see the real execution of the workflow in inverbis, with its variants, loops, process metrics…

| Panel | ||||
|---|---|---|---|---|
| ||||
Release Notes |